Sample for Adding Buttons to Record List and Detail Screens
When customizing with JavaScript in kintone, a common method is to add buttons to the screen and execute specific processes when the buttons are clicked.
This page introduces how to add buttons to the record list and detail screens and execute processes when the buttons are clicked.
Adding Buttons to the Record List Screen
For the record list, there are two APIs available: one to get the space on the right side of the header where the list selection and filter icons are placed, and one to get the space below the header.
Get the element on the right side of the menu

Get the element below the menu

By using these APIs to get the target elements where the buttons will be placed, you can implement buttons on each screen.
(() => {
  'use strict';

  kintone.events.on('app.record.index.show', (event) => {
    /** Space on the right side of the header */
    const headerSpace = kintone.app.getHeaderMenuSpaceElement();

    /** Button to be placed */
    const button = document.createElement('button');

    // Button settings
    button.textContent = 'Show Alert';
    button.onclick = () => {
      // Write the process to be executed when the button is clicked here
      alert('Button clicked');
    };

    // Add the button to the space on the right side of the header
    headerSpace.append(button);

    return event;
  });
})();
To place a button in the space below the list header instead, use kintone.app.getHeaderSpaceElement().
Adding Buttons to the Record Detail Screen
For the record detail screen, there is an API available to get the space above the header where the “Save” and “Cancel” buttons are placed.
Get the element above the menu
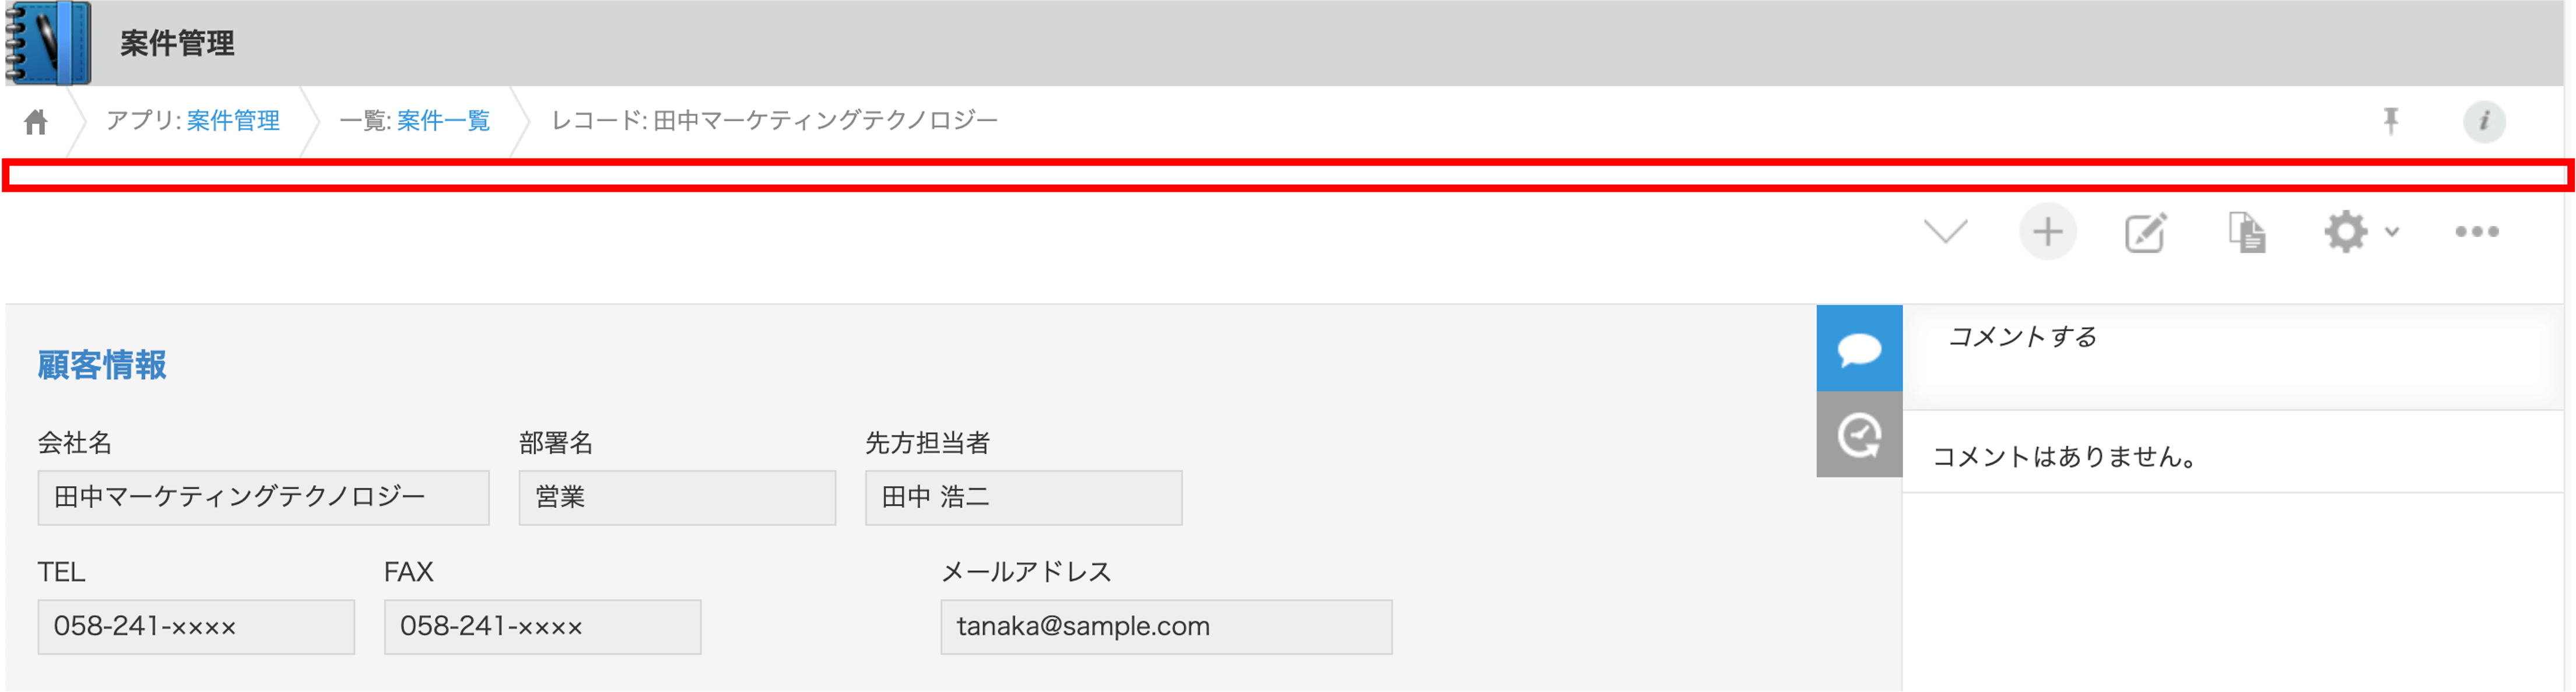
By using this API, you can place buttons in the same way as the record list screen mentioned earlier.
(() => {
  'use strict';

  kintone.events.on('app.record.detail.show', (event) => {
    /** Space above the header */
    const headerSpace = kintone.app.record.getHeaderMenuSpaceElement();

    /** Button to be placed */
    const button = document.createElement('button');

    // Button settings
    button.textContent = 'Show Alert';
    button.onclick = () => {
      // Write the process to be executed when the button is clicked here
      alert('Button clicked');
    };

    // Add the button to the space on the above the header
    headerSpace.append(button);

    return event;
  });
})();
Adding Buttons to the Record Edit Screen
The API used for the record detail screen can also be used for the record edit screen.
(() => {
  'use strict';

  kintone.events.on('app.record.edit.show', (event) => {
    /** Space above the header */
    const headerSpace = kintone.app.record.getHeaderMenuSpaceElement();

    /** Button to be placed */
    const button = document.createElement('button');

    // Button settings
    button.textContent = 'Show Alert';
    button.onclick = () => {
      // Write the process to be executed when the button is clicked here
      alert('Button clicked');
    };

    // Add the button to the space on the above the header
    headerSpace.append(button);

    return event;
  });
})();
Advanced: Handling Multiple Events
The above samples introduced how to add buttons to the record list, record detail, and record edit screens.
However, if you want to add buttons to multiple screens, writing the process for each event can be redundant.
As a solution, you can implement a common process for multiple events and write only the part that adds the button for each event, or you can generalize the function that adds the button.
Implementing a Common Process for Multiple Events
First, let’s introduce a method to implement a common process for multiple events.
(() => {
  'use strict';

  kintone.events.on(["app.record.index.show", "app.record.detail.show", "app.record.edit.show"], (event) => {
    /** Space on the right side of the header */
    const headerSpace = kintone.app.getHeaderMenuSpaceElement() ?? kintone.app.record.getHeaderMenuSpaceElement();
    if (!headerSpace) {
      return event;
    }

    /** Button to be placed */
    const button = document.createElement('button');

    // Button settings
    button.textContent = 'Show Alert';
    button.onclick = () => {
      // Write the process to be executed when the button is clicked here
      alert('Button clicked');
    };

    // Add the button to the element
    headerSpace.append(button);

    return event;
  });
})();
By using the nullish coalescing operator for headerSpace, it gets the element for whichever screen is running, because each API returns null on screens it does not apply to.
Immediately after, it checks headerSpace and terminates the process if the element could not be obtained, but if you register only the intended events, this check is usually unnecessary.
Generalizing the Function to Add Buttons
Next, let’s introduce a method to generalize the function that adds buttons.
(() => {
  'use strict';

  const addButton = (element) => {
    /** Button to be placed */
    const button = document.createElement('button');

    // Button settings
    button.textContent = 'Show Alert';
    button.onclick = () => {
      // Write the process to be executed when the button is clicked here
      alert('Button clicked');
    };

    // Add the button to the element
    element.append(button);
  };

  kintone.events.on('app.record.index.show', (event) => {
    addButton(kintone.app.getHeaderMenuSpaceElement());
    return event;
  });

  kintone.events.on('app.record.detail.show', (event) => {
    addButton(kintone.app.record.getHeaderMenuSpaceElement());
    return event;
  });

  kintone.events.on('app.record.edit.show', (event) => {
    addButton(kintone.app.record.getHeaderMenuSpaceElement());
    return event;
  });
})();
This implementation is more straightforward and easier to understand.
Which method to adopt depends on the scale and requirements of the project, so choose the appropriate method according to your environment.